When someone asks me how to teach a Suzuki group class, my short answer is to spend a lot of time working out the perfect lesson plan, then throw it in the trash can within the first five minutes of class.
I have spent a great deal of time developing lesson plans and group class themes over the years. Unfortunately, I seldom had opportunities to teach some of them, although I have taught bits and pieces. The mental exercise that lies behind lesson plan generation helps me to focus my ideas, and it builds up my arsenal of activities and possibilities.
I have to be light on my feet and mentally flexible for a variety of reasons:
- Students forget to tell you they will be out of town (or playing in a sports tournament or fiddling contest)
- Funerals and illnesses occur unexpectedly
- Some folks do not know how to use a calendar well
- Birthday parties and sleepovers are more fun
- Other siblings take precedence that day
All of these excuse possibilities make it difficult for me to come up with the definitive group class lesson plan that will apply on any given group class day. I might have been annoyed at one time, but not anymore. I have learned how to make up a group class lesson plan on the fly. I do not intend my idea to be a substitute for advance planning. Quite the contrary, I still generate lesson plans. I find, however, that I need to be good at making lesson plans so that I can make up a new one quickly to fit the particular situation as I find it on group class day. Here is how I do it.
I divide my group class into several parts:
Warm up and Tune up:
- The students and I tune up our instruments. This gives me a moment or two with each child and possibly the parent and a sibling. We touch base with each if we have not seen each other in a few days, and it helps me to get my student relaxed and get a sense of my student's energy level for that day.
- I begin the class with introductions. I make sure that everyone has met everyone else and remembers other student names.
- We get ourselves organized in terms of space. Everyone chooses a place to stand and checks to make sure they have enough bowing room.
- Sometimes we stand in a line and sometimes we stand in a circle.
- One fun game during a group class is to spell out the letters of a particular word, such as "violin." First we group ourselves to form the letter "V." Then we will form the letter "I" and subsequently "O." This is a great game to help students gain spatial understanding as it relates to themselves and their surroundings. This is not an easy task for adults either!
- If I have a group class theme going for the year, semester, or class, then I remind my students what we are working on. If we have a recital at the end of the semester or some other performance, then I remind students about this.
- This opening time is also a great opportunity to make announcements or give reminders to parents and students.
Set up steps and bow:
- We center ourselves. I ask students how I can tell if they are ready. My students answer that I know they are ready because they are looking at me. Then I go down the line and point to each student as they look at me: "You're looking at me. You're ready." This repetitive activity helps to settle everyone down and get their attention. Everyone knows that I will look at them, so they get themselves ready and look at me.
- When everyone is ready, I do a deep inhale and then bow.
- I have added the deep breath as a preparation to every bow I do with my students from the very first lesson.
- I believe that it is important to teach instrumental students about musical "breathing" and phrasing. One day my students will play in an orchestra, so I want them to learn how to collectively breathe with a conductor so that they start playing together.
- I go through the set up steps routine and take a few seconds to make adjustments to posture as needed. In the case of little ones or beginning students, I ask the parents to be part of the class and make these adjustments for me so that my class is not bogged down.
- feet first, get them planted
- thumb spot, scoop the hand under
- put up on "high" shoulder
- check bow bold: strong bumpy thumb (young thumb), two sleepy best friends, curved pinkie, Captain Hook (as opposed to Captain Hog)
- If my students seem a bit out of it, I might add some other copy cat games or warm up activity to muster the students’ attention onto me. Copy cats is a great way to get everyone paying attention.
Tonalization
- We warm up with some "call and response" Mississippi Hotdogs (Taka taka stop stop, Pepperoni Pizza, Armadillo Cowboys, etc.) on E string, then A string.
- We do some open string songs: Bunny Song, E string Concerto, A string Concerto, David Tasgal's "Blast Off" or "Duck Song," or a song I've written (Squeaky Mouse, Dirty Doggie Scrub Scrub).
- For older students I will use long bow tone songs, such as Twinkle theme, Chorus from Judas Maccabeas, long tone scale, Dr. Suzuki's tonalization exercises, or 15-30-45-60 second bows.
New Skill:
- If we are working on a new skill, I introduce group activities that will teach or reinforce the skill. Group classes are great places to reach a larger number of students at one time for these topics:
- higher position fingering
- duet parts to earlier Suzuki volumes
- articulation (bowings and sound production)
- music vocabulary: crescendo, decrescendo or diminuendo, fermato, ritard, tempo markings
- music history: composers, music analysis, historical music period
- Last fall I introduced a few segments of listening to different kinds of music.
- I played a Japanese film set to a different orchestral transcription of "Pictures at an Exhibition." The kids enjoyed watching the movie on my iPad while listening to the new music.
- We listened to a different composer at each group class, such as Tchaikovsky (1812) or Haydn ("Surprise" Symphony) and discussed some of the story behind the pieces.
- We listened to an introduction to the instruments of the orchestra, which was from a recording I loved listening to as a child.
Ensemble:
- This is the best part of a group class! We learn how to play together. I will leave the finer points of how to accomplish this for a later post. For now, let me just say that we find ways to work on whatever we need at the moment and build up our ensemble skills.
- If I have a student in book 3 and one in book 5, I might work on playing Gavotte in G Minor or Humoresque (book 3) and show the students by my leading how to make phrasing together as an ensemble.
- Then I would play something with my book 5 student to demonstrate this same principle while my book 3 student watches. For example, my student and I might play Country Dance together (book 5) because it is a tricky piece to play together.
- There is something about ensemble skills for every conceivable level of playing. My pre-twinkler students can learn ensemble with Mississippi Hot Dog or by reciting a jingle from William Starr's "I Know a Fox, With Dirty Socks" (which is a very popular book with my students 6 and under! Do not underestimate the appeal of rhymes and jingles!).
- It is possible to teach "ensemble" playing by something as simple as setting a metronome to a reasonable speed and passing a stuffed toy around a circle of seated students in time with the beat.
- Marching, clapping, and other physical movements (including speech) are also ways to teach ensemble skills. Have you ever seen the YouTube video "Synchronisation"? The person sets five different metronomes ticking at different speeds, and after a short while, all of the metronomes are ticking at the same time. Eerie! A roomful of marching children creates that same effect. [http://youtu.be/W1TMZASCR-I]
- Nothing is funnier than doing the knee walk! This is a great way to curb "rushing." I ask the students to get on their knees and "walk" across the room while they play Perpetual Motion, for example. An entire room of knee walking students looks like penguins. Warning: adults do not enjoy doing this game! Too hard on the knees.
Other Considerations:
- It is helpful to follow the Muzak principle when structuring a group class. If you notice, Muzak plays peppier music earlier in the day and slower music later in the afternoon in an attempt to mimic most folks' energy levels and biorhythms.
- Group class activities do not have to involve the violin! There are some wonderful ways to introduce musical concepts, posture or habit reinforcements, or listening skills without the instrument or bow in hand. Get creative with this!
And now the moment you have been waiting for! What was my personal experience with group class in the beginning?
I taught for several years and did not teach group classes. When I embarked on the SAA Teacher Training program, the curriculum included discussions and observations of group classes. I learned quickly that there was a great value to a group class. Not only would I reach a larger number of students at one time, but I would also be able to use the classes to motivate students to want to learn. Older (or more experienced) students would learn how to be strong leaders and role models, and younger (or less experienced) students would learn by watching. I cannot put my finger on the exact moment when these roles would cross over the line for a student, and that is a fun part of teaching, as I watch a student grow from young beginner to a student who turns to a younger, less advanced student and offers help or advice with the voice of authority and experience. Very cool.
So I finished up my summer teacher training courses determined to begin a group class program. I was a nervous wreck! Would students come? Would parents buy into the group class program idea? Where would I hold this class? What would I do? How would I structure the class? Yikes! Thank heavens for the group class book "Group Class Lessons for Violin and Viola" by Carolyn McCall! I spent several hours coming up with a great lesson plan for my first class. Looking back on this preparation, I have to laugh, because the class would have lasted five hours if I had completed every item on my list. I was younger then and had a lot to learn. Those parents of my students who remember that first class still laugh about how awful the kids sounded that first time.
There were two things I did in that first class that were terrific and set the tone for me to remember what is important and useful in the future: clapping together and Twinkle/May Song duet:
- I asked everyone to sit on the floor and close their eyes. Then I told them to clap together with me at the same time. I gave no signal. Of course the clapping was ridiculous, as everyone guessed when to do it; it was a mess! I asked everyone why we were not together. I got lots of answers and lots of suggestions of things to try to improve our ensemble, and we tried every single one. After five minutes, one of my youngest students called out that we were not playing together because we could not see each other. So we tried clapping together with our eyes open and looking at each other, and we were perfect! That lesson was learned!
- I am an older and more experienced teacher now. I can get students to clap together with their eyes closed just by breathing. I have added this skill to my arsenal of teaching ideas.
- Some of my students knew Twinkle Theme really well. Others knew May Song really well. Both songs when played together make a nice duet This was the very first ensemble piece that I taught my students. It was a mess! We got better at it.
Like any other skill and ability, group class teaching gets easier with practice. I know several teachers who join forces together to do group classes. In this way, they can gain the benefit of group class instruction even though they have a small number of students in the studio. Every time you teach a group class, you will learn something new as a teacher. You will improve with practice.
My favorite group class was the day that I had just two students show up: a pre-Twinkler (6 year old) and a student at the end of book 1 (12 year old). We had a great class, and I am still amazed to think about it. Both students taught each other something, and I was able to think of something to do with each student to challenge them and make the class interesting.
But . . . I would still like to use one of those perfect lesson plans one day.
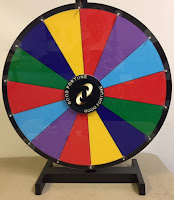
Here is a blog post about the fun we had using a giant color spinning wheel in group class: The Wheel of Music.
 |
| The Wheel of Music |
Want to see something incredible like the metronome video? Check out: http://youtu.be/V87VXA6gPuE
Until next time,
Happy Practicing!
Paula